The Reports section is the core feature of the FHP Admin Panel. It allows officers to review and manage citizen-submitted tips. Reports may include personal information, category tags, descriptions, chat messages, and location data.
👥 Who Can Access
- Dispatch Role ✅
- Editor Role ❌
- Admin Role ✅
📄 Reports List View
This is the landing view when accessing the Reports section. You will see a table listing all reports submitted by citizens via the mobile app.
📋 Columns Displayed:
- ID – Unique identifier of the report.
- Name – Name of the person who submitted the report.
- Phone Number – Contact number of the reporter.
- Description – A brief note or summary of the incident.
- Category – The type of report (e.g., Traffic Crash, Human Trafficking).
- Importance Level – Displayed as color-coded badges:
- 🟥 High
- 🟨 Medium
- 🟩 Low
- Status – The current state of the report:
ReceivedIn ProgressHandled
- Tags – Custom labels added to describe the case.
- Created At – Date and time the report was submitted.
- Actions – Icons to:
- View report details
- Move report to Trash
- Send the report
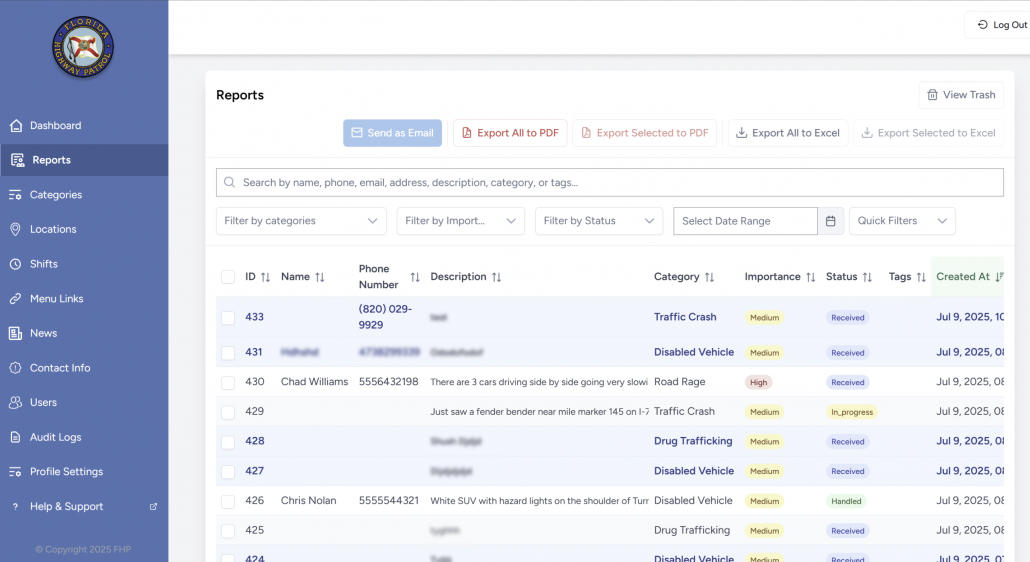
🔍 Filters & Bulk Tools:
- Filter by Category, Importance Level, Status, or Date Range
- Quick Filters button for commonly used filter sets
- Bulk export:
- Export All to PDF or XLSX
- Export Selected
- Send by Email – Email selected reports to a designated address.
- View Trash – See reports that have been removed but not permanently deleted.
🕵️ Report Details View
Clicking on a report from the list opens the full details. This view enables deep investigation and communication with the reporter.
🧾 Fields and Sections:
Basic Info:
- Name
- Importance Level – Dropdown to change between High, Medium, or Low
- Status – Update to:
ReceivedIn ProgressHandled
Contact:
- Phone Number – Click to call or copy
- Email Address – Click to open email client or copy
Address & Description:
- Address – Location of the incident (as entered by the user)
- Description – Full narrative from the reporter
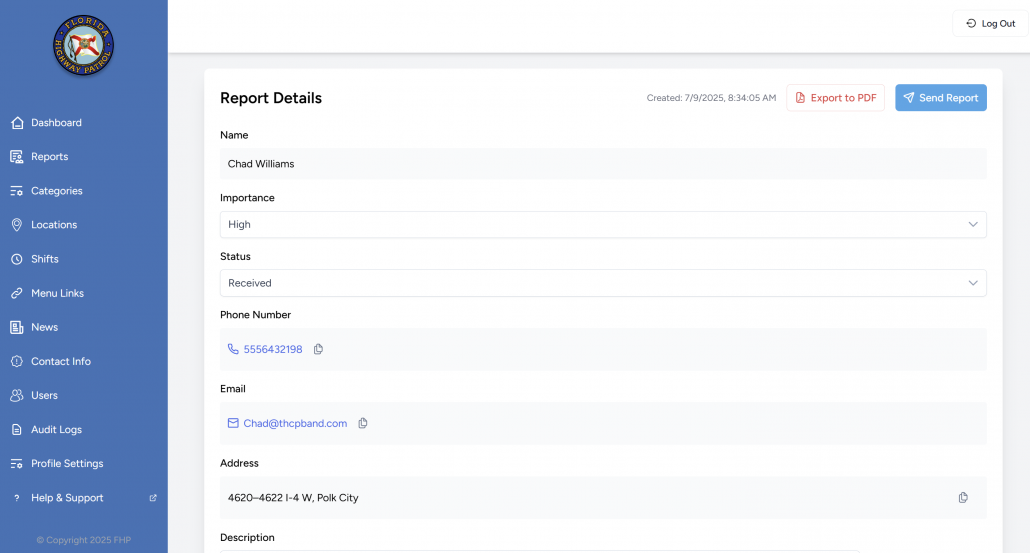
Classification:
- Category – Predefined category like Traffic Crash or Human Trafficking
- Tags – Add/remove tags to organize or label the report. Previously used tags are displayed under this field and you can choose from them.
📍 Location:
- A dynamic map view with the report’s geolocation
- Buttons to:
- Show Route to Location
- Open in Google Maps
- Open in Waze

📎 Files (if any):
- Attachments from the citizen (images, documents, etc.)
💬 Chat with Reporter:
- Officers can exchange messages with the reporter in real time
- Messages show delivery status (e.g., “Delivered”)
- Useful for clarification or additional instructions
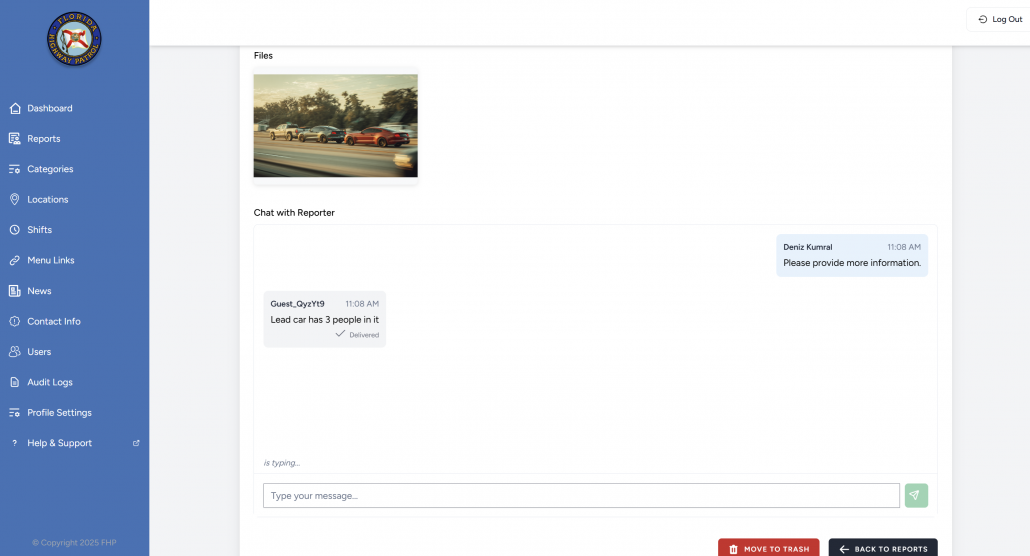
🗑️ Actions (Bottom of the Page):
- Move to Trash – Archive the report
- Back to Reports – Return to the main list
- Send Report (top right) – Trigger external sharing via email or other system workflows
🧠 Notes for Dispatch Officers
- Always review Importance Level first. This guides how urgently the report should be addressed.
- Use the chat feature to clarify vague or incomplete reports before updating the status.
- Set clear and appropriate status labels so other officers are aware of the report’s progress.
- Apply tags and categories consistently – these affect visibility in filters and exports.